
1.Apex 트리거로 플랫폼 이벤트 알림 구독을 진행하려면 트리거가 실행되야 하는데
대기열에 넣고 사용하기 위해서는 queues 를 생성해야 하며
아래와 같이 코드를 작성해 과제를 통과할 수 있었다.
trigger OrderEventTrigger on Order_Event__e (after insert) {
    // List to hold all tasks to be created.
    List<Task> tasks = new List<Task>();
    // Get queue Id for task owner
    Group queue = [SELECT Id FROM Group WHERE Name='Regional Dispatch' AND Type='Queue'];
    // Iterate through each notification.
    for (Order_Event__e event : Trigger.New) {
        if (event.Has_Shipped__c == true) {
            // Create Task to dispatch new team.
            Task cs = new Task();
            cs.Priority = 'Medium';
            cs.Subject = 'Follow up on shipped order 105';
            cs.OwnerId = event.CreatedById;
            tasks.add(cs);
        }
   }
    // Insert all tasks corresponding to events received.
    insert tasks;
}
2.세일즈포스에서는 자체적으로 제공하는 개발 도구 모음 페이지(low-code)와
일반적인 개발 방식(pro-code)가 존재하는데 각 방식에 종류는 아래와 같다.
| Low-code | Pro-code |
| • Lightning pages • Quick actions • URL buttons • Utility bar • Flows | • Lightning Web Components • Aura Components • Visualforce |
3.lwc는 아래와 같은 방식으로 페이지가 출력된다.
//조건에 따른 페이지 출력 분기
<template>
    <template lwc:if={areDetailsVisible}>
        These are the details!
    </template>
    <template lwc:else>
        No details!
    </template>
</template>


//js mapping과 유사한 순회(반복) 데이터 분배
<template>
    <template for:each={contacts} for:item="contact">
        <p key={contact.Id}>
            {contact.Name}
        </p>
    </template>
</template>


//핸들러 호출(버튼 구현)
//html
<template>
    <a onclick={handleButtonClick}></a>
</template>
//js
import { LightningElement } from 'lwc';
export default class EventHandler extends LightningElement {
    handleButtonClick(event) {
        // Do whatever...
    }
}


//다른 컴포넌트 가져오기
<template>
    <c-contact-tile contact={contact}></c-contact-tile>
    <lightning-badge label="LWC rocks!"></lightning-badge>
</template>


//상태값?변경
//html
<template>
    <lightning-input
        type="number"
        label="Number of Employees"
        value={numberOfEmployees}
        onchange={handleChange}>
    </lightning-input>
</template>
//js
<template>
    <lightning-input
        type="number"
        label="Number of Employees"
        value={numberOfEmployees}
        onchange={handleChange}>
    </lightning-input>
</template>
4.상위 Lightning 웹 구성 요소는 하위 구성 요소를 포함하고 통신할 수 있으며
상위, 하위 구성 요소는 <apex:component>, <apex:include>처럼 연관되어야 하는 것 같다.
5.과제 통과한 간단한 lwc code
//html<template>
    <lightning-card>
        <lightning-input
            type="number"
            label="Annual Revenue"
            formatter="currency"
            value={annualRevenue}
            onchange={handleChange}>
        </lightning-input>
        <lightning-button
            label="reset"
            onclick={reset}>
        </lightning-button>
    </lightning-card>
  </template>

//js
import { LightningElement } from 'lwc';

export default class AccountFinder extends LightningElement {
    annualRevenue = null;
    handleChange(event) {
        this.annualRevenue = event.detail.value;
    }
    reset() {
        this.annualRevenue = null;
    }
}

//meta
<?xml version="1.0" encoding="UTF-8"?>
<LightningComponentBundle xmlns="http://soap.sforce.com/2006/04/metadata">
    <apiVersion>56.0</apiVersion>
    <isExposed>true</isExposed>
    <targets>
        <target>lightning__AppPage</target>
    </targets>
</LightningComponentBundle>
6.apex 호출을 하기 위해서는 아래의 내용을 import 해야 하며
해당 코드를 사용하기 위해서는 아래와 같이 사용한다.
//호출할 떄 사용할 import
import queryAccounts from '@salesforce/apex/AccountListControllerLwc.queryAccounts';

//meta
<?xml version="1.0" encoding="UTF-8" ?>
<LightningComponentBundle xmlns="http://soap.sforce.com/2006/04/metadata">
    <apiVersion>48.0</apiVersion>
    <isExposed>true</isExposed>
    <targets>
        <target>lightning__RecordPage</target>
    </targets>
</LightningComponentBundle>

//js
import { LightningElement, wire, api } from 'lwc';
import queryRelatedContacts from '@salesforce/apex/AccountControllerLwc.queryRelatedContacts';
export default class AccountInfo extends LightningElement {
    @api recordId;
    @wire(queryRelatedContacts, { accountId: '$recordId' })
    contacts;
}

//cls
public with sharing class AccountControllerLwc {
    @AuraEnabled(cacheable=true)
    public static List<Contact> queryRelatedContacts(Id accountId) {
        return [
            SELECT Name, Title, Email, Phone
            FROM Contact
            WHERE AccountId = :accountId
        ];
    }
}


//에러관리
try {
    // Perform logic that may throw an exception.
} catch (Exception e) {
    throw new MyCustomException('Records could not be retrieved at this time. Try again later');
}
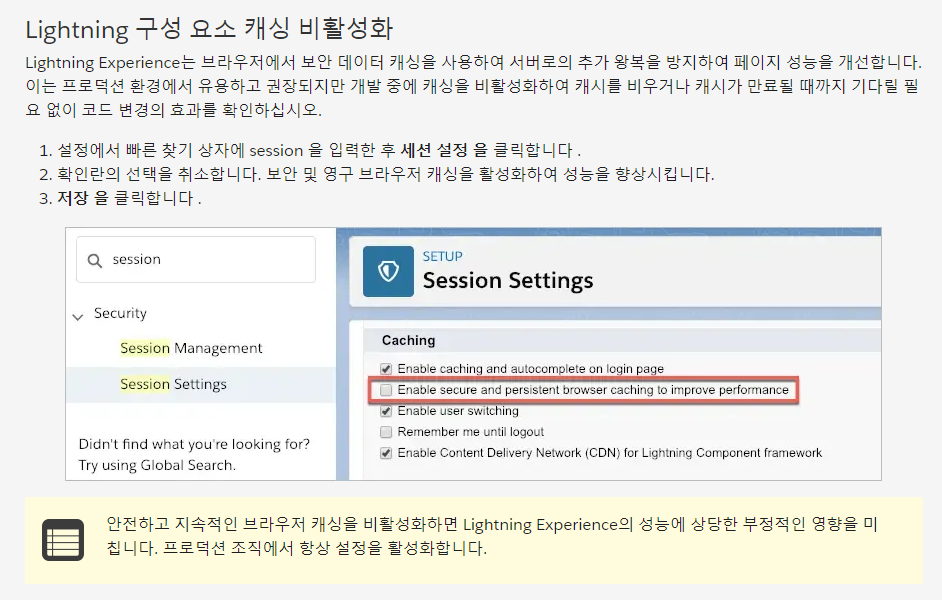
7.캐시관리
8.출력할 자료를 js에서 cls로 받아 html로 출력한 과제통과 코드
//class cls
public with sharing class AccountListControllerLwc {
    @AuraEnabled(cacheable=true)
    public static List<Account> queryAccountsByEmployeeNumber(Integer numberOfEmployees) {
        return [
            SELECT Name
            FROM Account
            WHERE NumberOfEmployees >= :numberOfEmployees
        ];
    }
    @AuraEnabled(cacheable=true)
    public static List<Account> queryAccountsByRevenue(Decimal annualRevenue) {
        return [
            SELECT Name
            FROM Account
            WHERE AnnualRevenue >= :annualRevenue
        ];
    }
}

//html
<template>
    <lightning-card>
        <lightning-input
            type="number"
            label="Annual Revenue"
            formatter="currency"
            value={annualRevenue}
            onchange={handleChange}>
        </lightning-input>
        <lightning-button
            label="reset"
            onclick={reset}>
        </lightning-button>
        <template lwc:if={accounts.data}>
            <template for:each={accounts.data} for:item="account">
                 <p key={account.Id}>{account.Name}</p>
            </template>
        </template>
    </lightning-card>
  </template>

//js
import { LightningElement, wire } from 'lwc';
import queryAccountsByRevenue from '@salesforce/apex/AccountListControllerLwc.queryAccountsByRevenue';

export default class AccountFinder extends LightningElement {
    annualRevenue = null;
    handleChange(event) {
        this.annualRevenue = event.detail.value;
    }
    reset() {
        this.annualRevenue = null;
    }
    @wire(queryAccountsByRevenue, { annualRevenue: '$annualRevenue' })
    accounts;
}

//meta
<?xml version="1.0" encoding="UTF-8"?>
<LightningComponentBundle xmlns="http://soap.sforce.com/2006/04/metadata">
    <apiVersion>56.0</apiVersion>
    <isExposed>true</isExposed>
    <targets>
        <target>lightning__AppPage</target>
    </targets>
</LightningComponentBundle>
9.Aura에서는 lwc를 사용할 수 있지만 lwc 내부에는 aura를 사용할 수 없다고 한다.
기능적인 면에서 lwc가 더 우수하기 때문에
aura에서 특정 UI 작동 딜레이 등의 문제가 발생한 경우
해당 부분만 lwc를 사용해 부분적으로 마이그레이션을 시작하는 것을 권장한다.
10.markup, css 부분에서 aura의 파일 명과 lwc에서 쓰는 파일 명의 차이는 아래와 같다.
| Resource | Aura File | Lightning Web Components File |
| Markup | sample.cmp | sample.html |
| Controller | sampleController.js | sample.js |
| Helper | sampleHelper.js | |
| Renderer | sampleRenderer.js | |
| CSS | sample.css | sample.css |
| Documentation | sample.auradoc | Not currently available |
| Design | sample.design | sample.js-meta.xml |
| SVG | sample.svg | Include in HTML file or upload as a static resource |
11.aura에서 lwc로 코드를 옮길 경우 아래의 규칙들이 존재한다.
- 네임스페이스(번개)와 구성 요소 이름(formattedNumber)을 구분하는 콜론을 대시로 변경합니다.
- 카멜 케이스 구성 요소 이름(formattedNumber)을 대시로 구분된 이름(formatted-number)으로 변경합니다.
- 카멜 케이스 속성 이름(currencyCode)을 대시로 구분된 이름(currency-code)으로 변경합니다.
//aura
<aura:component>
    <lightning:formattedNumber value="5000" style="currency"
      currencyCode="USD" />
</aura:component>

//lwc
<template>
    <lightning-formatted-number value="5000" style="currency"
      currency-code="USD">
    </lightning-formatted-number>
</template>
12.aura에서 form을 사용하는 것과 lwc에서 사용하는 것 모두 동일한 기능을 제공하지만
사용하기 위한 명명 규칙에 약간의 차이가 있다.
| Form Function | Aura component | Lightning web component |
| Support edit, view, and read-only modes | lightning:recordForm | lightning-record-form |
| Read-only form | lightning:recordViewForm | lightning-record-view-form |
| Editable form | lightning:recordEditForm | lightning-record-edit-form |
13.왜 lwc가 아닌 aura → lwc 트레일에서 언급된건지는 모르겠지만
@wire를 사용할 때는 레코드를 읽기만 하고 생성, 수정, 삭제를 하지 말라고 한다.
14.단위테스트와 전체 테스트를 비교하면
단위 테스트는 하나의 단위만 테스트하기 때문에 빠르고 결과를 신뢰할 수 있으며 문제점을 파악하기 쉽다.
하지만 종단 테스트는 더 오랜 시간이 걸리고 실행마다 세세한 결과가 다를 수 있으며
문제가 발생한 지점을 정확하게 파악할 수는 없지만 여러가지 기능을 한번에 다루기 때문에
연계적으로 발생할 수 있는 문제들을 파악할 수 있으며
실제 사용자의 입장에서 시뮬레이션 할 수 있다는 장점이 있다.
15.lwc는 Jest를 사용해 테스트할 수 있지만 aura 구성 요소에서는 작동하지 않는다.
16.아래의 과정을 통해 jset를 실행할 수 있다.
1.node, npm install

2.sfdx update

3.sfdx force:lightning:lwc:test:setup

4.node node_modules/@salesforce/sfdx-lwc-jest/bin/sfdx-lwc-jest

5.npm run test:unit(단위) / npm run test:unit:watch(지속적 감시)

//자세한 내용은 package.json에 존재한다.
"test:unit": "sfdx-lwc-jest",
"test:unit:watch": "sfdx-lwc-jest --watch",
"test:unit:debug": "sfdx-lwc-jest --debug",
"test:unit:coverage": "sfdx-lwc-jest --coverage",
17.아래와 같은 코드를 통해 기능이 제대로 작동하지는지를 테스트할 수 있었다.
//sum test
import { sum } from '../sum';

describe('sum()', () => {
  it('should add 1 and 2 returning 3', () => {
    expect(sum(1, 2)).toBe(3);
    expect(sum(1, 2)).not.toBeGreaterThan(3);
  });
});

//unitTest
import { createElement } from 'lwc';
import UnitTest from 'c/unitTest';

describe('c-unit-test', () => {
  afterEach(() => {
    // The jsdom instance is shared across test cases in a single file so reset the DOM
    while(document.body.firstChild) {
      document.body.removeChild(document.body.firstChild);
    }
  });

  it('displays unit status with default unitNumber', () => {
    const element = createElement('c-unit-test', {
      is: UnitTest
    });
    expect(element.unitNumber).toBe(5);
    // Add the element to the jsdom instance
    document.body.appendChild(element);
    // Verify displayed greeting
    const div = element.shadowRoot.querySelector('div');
    expect(div.textContent).toBe('Unit 5 alive!');
  });

  it('displays unit status with updated unitNumber', () => {
    const element = createElement('c-unit-test', {
     is: UnitTest
    });
    // Add the element to the jsdom instance
    document.body.appendChild(element);
    // Update unitNumber after element is appended
    element.unitNumber = 6

    const div = element.shadowRoot.querySelector('div');
    // Verify displayed unit status
    expect(div.textContent).not.toBe('Unit 6 alive!');

    // Return a promise to wait for any asynchronous DOM updates. Jest
    // will automatically wait for the Promise chain to complete before
    // ending the test and fail the test if the promise rejects.
    return Promise.resolve().then(() => {
      expect(div.textContent).toBe('Unit 6 alive!');
    });
  });

  it('displays unit status with input change event', () => {
    const element = createElement('c-unit-test', {
      is: UnitTest
    });
    document.body.appendChild(element);
    const div = element.shadowRoot.querySelector('div');

    // Trigger unit status input change
    const inputElement = element.shadowRoot.querySelector('lightning-input');
    inputElement.value = 7;
    inputElement.dispatchEvent(new CustomEvent('change'));

    return Promise.resolve().then(() => {
      expect(div.textContent).toBe('Unit 7 alive!');
    });
  });
});
18.Lightning 웹 구성 요소는 사용자 인터페이스 API가 지원하는
모든 사용자 정의 및 표준 개체에서 Salesforce 데이터 및 메타데이터에 액세스할 수 있지만
외부 개체 지원은 되지 않으며
REST 클라이언트를 사용하여 데이터의 스냅샷을 가져와 테스트 데이터를 가져올 수 있는데
이 방법이 JSON을 직접 작성하는 것 보다 더 정확하다고 한다.
/services/data/v47.0/ui-api/records/0011J00001A3VFo?fields=Account.Name,Account.Industry&optionalFields=Account.Phone,Account.Owner.Name
19.wire 및 mock 관련 test code
//test
import { createElement } from 'lwc';
import WireLDS from 'c/wireLDS';
import { getRecord } from 'lightning/uiRecordApi';

// Mock realistic data
const mockGetRecord = require('./data/getRecord.json');

describe('c-wire-l-d-s', () => {
  afterEach(() => {
    while (document.body.firstChild) {
      document.body.removeChild(document.body.firstChild);
    }
  });

  describe('getRecord @wire data', () => {
    it('renders contact details', () => {
      const element = createElement('c-wire-l-d-s', {
        is: WireLDS
      });
      document.body.appendChild(element);

      // Emit data from @wire
      getRecord.emit(mockGetRecord);

      return Promise.resolve().then(() => {
        // Select elements for validation
        const nameElement = element.shadowRoot.querySelector('p.accountName');
        expect(nameElement.textContent).toBe(
          'Account Name: ' + mockGetRecord.fields.Name.value
        );

        const industryElement = element.shadowRoot.querySelector('p.accountIndustry');
        expect(industryElement.textContent).toBe(
          'Industry: ' + mockGetRecord.fields.Industry.value
        );

        const phoneElement = element.shadowRoot.querySelector('p.accountPhone');
        expect(phoneElement.textContent).toBe(
          'Phone: ' + mockGetRecord.fields.Phone.value
        );

        const ownerElement = element.shadowRoot.querySelector('p.accountOwner');
        expect(ownerElement.textContent).toBe(
          'Owner: ' + mockGetRecord.fields.Owner.displayValue
        );
      });
    });
  });

  describe('getRecord @wire error', () => {
    it('shows error message', () => {
      const element = createElement('c-wire-l-d-s', {
        is: WireLDS
      });
      document.body.appendChild(element);

      // Emit error from @wire
      getRecord.error();

      return Promise.resolve().then(() => {
        const errorElement = element.shadowRoot.querySelector('p');
        expect(errorElement).not.toBeNull();
        expect(errorElement.textContent).toBe('No account found.');
      });
    });
  });
});

//html
<template>
    <lightning-card title="Wire Lightning Data Service" icon-name="custom:custom108">
        <template if:true={account.data}>
          <p class="accountName">Account Name: {name}</p>
          <p class="accountIndustry">Industry: {industry}</p>
          <p class="accountPhone">Phone: {phone}</p>
          <p class="accountOwner">Owner: {owner}</p>
        </template>
        <template if:true={account.error}>
          <p>No account found.</p>
        </template>
      </lightning-card>
</template>

//js
import { LightningElement, api, wire } from 'lwc';
import { getRecord, getFieldValue } from 'lightning/uiRecordApi';
import NAME_FIELD from '@salesforce/schema/Account.Name';
import OWNER_NAME_FIELD from '@salesforce/schema/Account.Owner.Name';
import PHONE_FIELD from '@salesforce/schema/Account.Phone';
import INDUSTRY_FIELD from '@salesforce/schema/Account.Industry';

export default class WireLDS extends LightningElement {
  @api recordId;

  @wire(getRecord, { recordId: '$recordId', fields: [NAME_FIELD, INDUSTRY_FIELD], optionalFields: [PHONE_FIELD, OWNER_NAME_FIELD] })
  account;

  get name() {
    return getFieldValue(this.account.data, NAME_FIELD);
  }

  get phone() {
    return getFieldValue(this.account.data, PHONE_FIELD);
  }

  get industry(){
    return getFieldValue(this.account.data, INDUSTRY_FIELD);
  }

  get owner() {
    return getFieldValue(this.account.data, OWNER_NAME_FIELD);
  }
}
//메타는 생성 후 수정하지 않아 통과
20.stub이라는 특정 구성 요소 또는 기능의 동작을 시뮬레이팅 하는 테스트 기술을 사용할 수 있는데
특정 소프트웨어 구성 요소 또는 시스템의 동작을 모방하는 방식으로 시뮬레이션을 동작하게 한다.
SFDC 스텁을 생성함으로써 개발자는 실제 Salesforce 구성 요소에 의존하지 않고
Salesforce 애플리케이션에 대한 자동화된 테스트를 작성할 수 있으므로 시간과 리소스를 절약할 수 있다.
(1).백준 5598번 카이사르 암호는 기존 암호 체계를 통해 변환한 암호를
다시 역순으로 해독해 글자로 고치는 문제였다.
처음에는 전, 후를 보고 input, output으로 생각하고 접근했지만
결과가 달라서 의아하게 생각하고 자세히 보니 역순으로 하라는 문제였다.
변환 자체는 단순히 -3, +23으로 처리할 수 있지만
역순은 +23, -3 으로 처리해야 했다.
const input = `FURDWLD`

let answer = ''

for(let i = 0 ; i < input.length ; i++){
    const charNum = input[i].charCodeAt()
    if(charNum < 68){
        answer += String.fromCharCode(charNum + 23)
    }
    else{
        answer += String.fromCharCode(charNum - 3)
    }
}

console.log(answer)'회고' 카테고리의 다른 글
| [수습일지] - 27(주말) (0) | 2023.04.22 |
|---|---|
| [수습일지] - 26 (0) | 2023.04.21 |
| [수습일지] - 24 (0) | 2023.04.19 |
| [수습일지] - 23 (0) | 2023.04.18 |
| [수습일지] - 22 (0) | 2023.04.17 |